DIY moth trapping (no kill!)

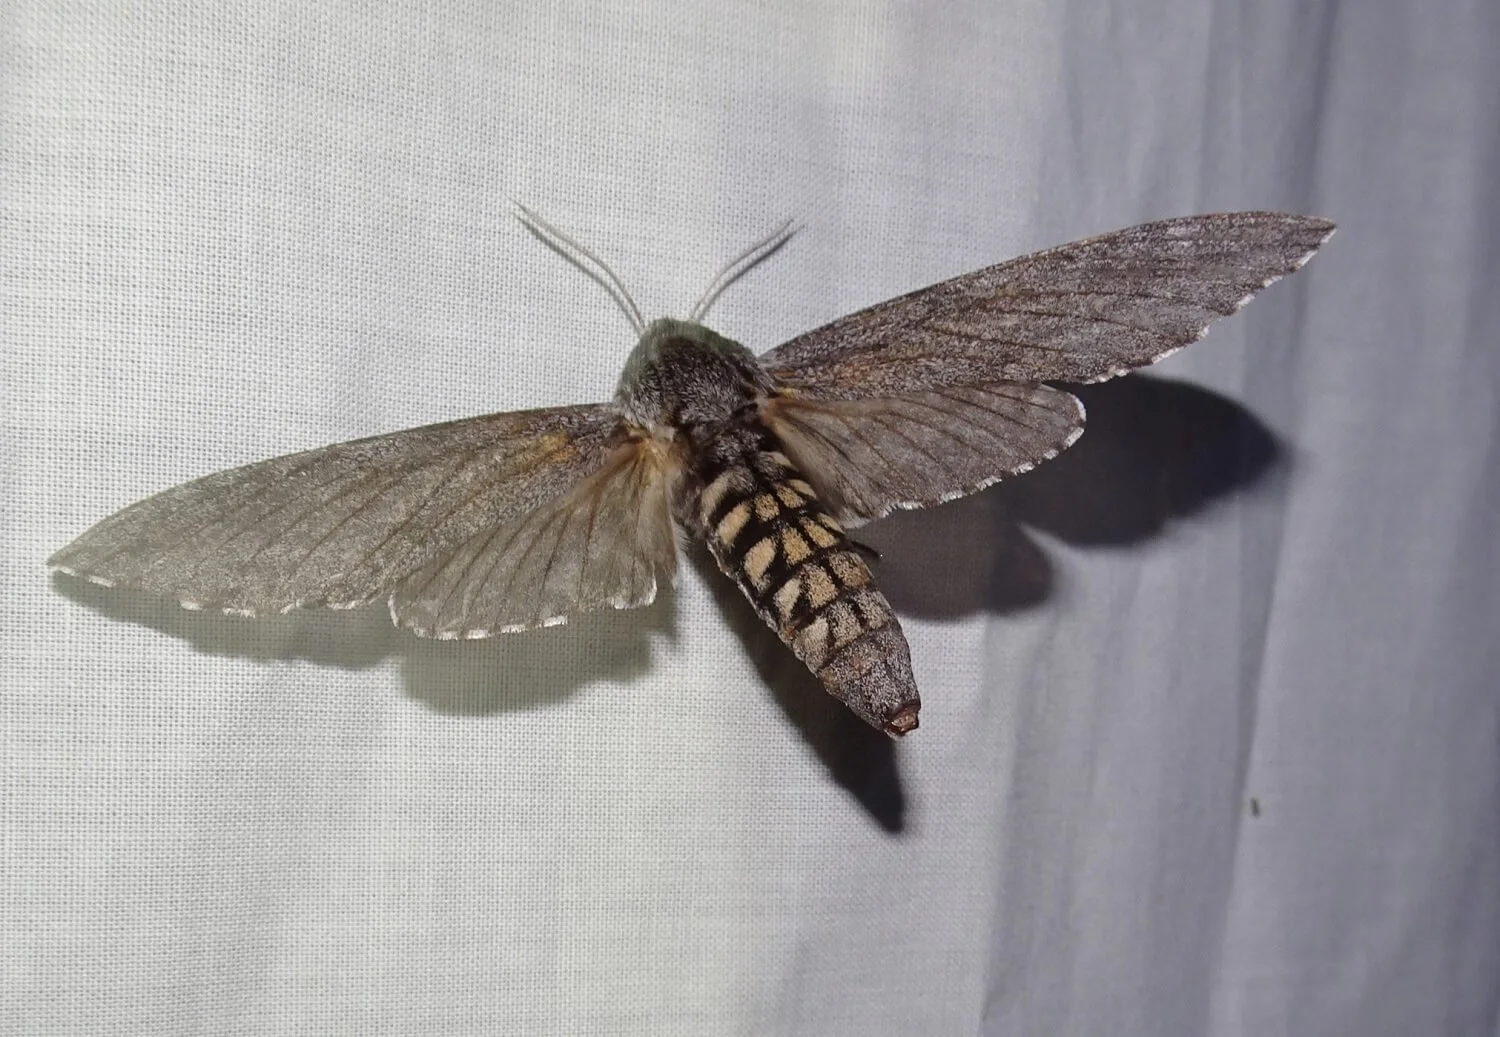
Mallee Looper moths (Arhodia spp.) attracted to a moth sheet. Photo: Mark Hura.
Why would you want to trap moths?
My uncle tells me gleefully about his trap to kill pantry moths. That’s not it!
I trap moths because it is fascinating to see what sorts of moths (and other insects) are flying around at night, normally unseen by us. But I don’t want to kill things, just so I can look at them. My moth traps are no kill. (More about that here).
So how do you trap moths you may ask. Read on for moth sheets or skip ahead for instructions on how to build your own bucket-and-funnel moth trap …


What is a moth sheet?
As in the photographs above, it is simply a white sheet, strung between two trees, with a moth-attracting light nearby. Moths are lured to the light and rest on the sheet making photography pretty easy. But it’s a night-time activity. The really keen folk might check their moth sheet all through the night… Did I mention I’m a morning person? If the moths haven’t arrived by 10pm, I’m off to bed.
I have had some excellent evenings with a moth sheet though. Like when Roger Standen and I found a Hawk Moth that was a new species for Victoria and a significant southern range expansion (Coenotes eremophilae). The best conditions for a moth sheet is around the new moon, when it is nice and dark. A calm, humid and warm night helps also.
How to make your own light sheet to attract moths
It’s deceptively simple. Hang a white sheet from a rope and place a moth-attracting light nearby. Secure the bottom of the sheet so it doesn’t flap about. We wind the bottom of the sheet around a length of PVC pipe and then secure the pipe on the ground with tent pegs.
For the light and power source I use:
Light - A 240V replacement light for bug zappers 50W Gecko brand (about $30). It is fitted into an Arlec 60W handheld work light housing with a 5m lead ($15).
Power source - I plug it into a power point with an extension lead or use a battery with inverter like the Powertech 155W power station ($220).
Desert Hawk moth (Coenotes eremophilae). The first record for Victoria was on Raakajilm and a significant range expansion.
What is a moth trap?
I don’t like staying up late at night so I was very excited to discover the set-and-forget moth trap.
There are many designs but the one I have chosen is a bucket with a funnel in the lid. The moth-attracting light is suspended above the funnel and is surrounded by four transparent vanes. The moth flies towards the light, hits the vanes and is directed down through the funnel. Moths accumulate in the bucket overnight and I check the catch early in the morning. No sleep lost!
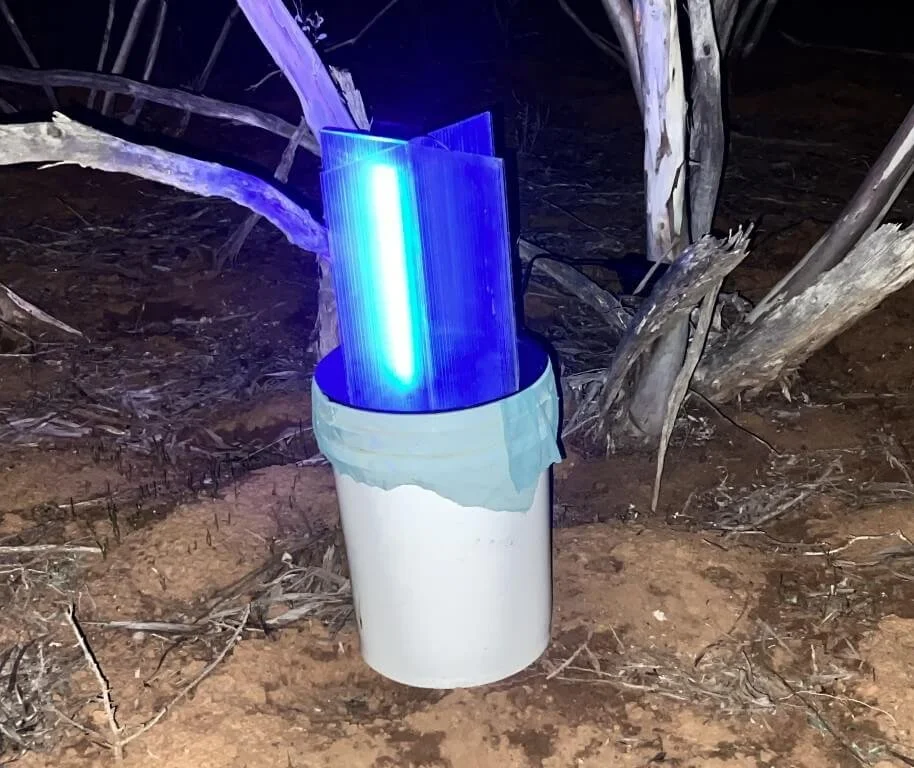
My DIY moth trap, coming in around $100 including the power source.
Make your own moth funnel trap!
To make your own funnel moth trap get yourself:
20L bucket ($15)
Giant big mouth funnel ($12).
Insect netting ($8 for 120x210cm) - this is enough for two traps
4mm clear twin wall polycarbonate sheet ($16 for a1200x600mm handisheet from Bunnings). You can cut vanes for two traps from one sheet.
A 5W USB UV tubelight ($22)
A 20,000mAh power bank ($40)
Total spend = $113
To “build” it:
Cut the netting into a piece 130 cm x 60 cm. The netting is draped inside the bucket to give the moths somewhere to land. You can sew it into a bag, or leave it flat.
Cut the long bit off the funnel, leaving about 1cm. The funnel will fit neatly into the bucket.
Cut the polycarbonate sheet into two pieces 29 cm x 42 cm (see the pattern here). We used a circular saw (with full face mask protection for plastic shards).
Cut a slit in each piece of polycarbonate (again, check the pattern). For piece A, cut a slot 22 cm long from the square end. For piece B, cu a 19.5cm slot from the pointed end. The two pieces slot together to make four vanes that sit inside the funnel.
That’s all the building!

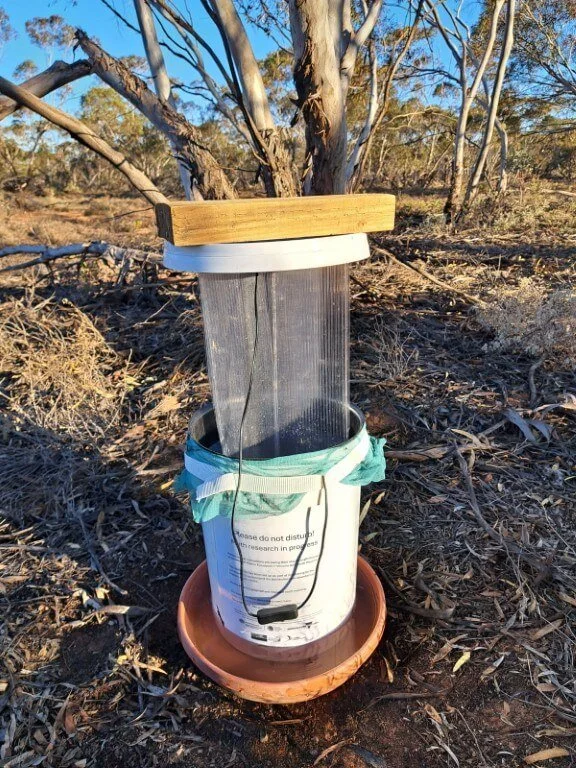
Parts of the DIY moth trap: 20L bucket, cut-off funnel, transparent vanes, 5W LED UV light, 20,000 mAh power bank.
How to use the moth trap
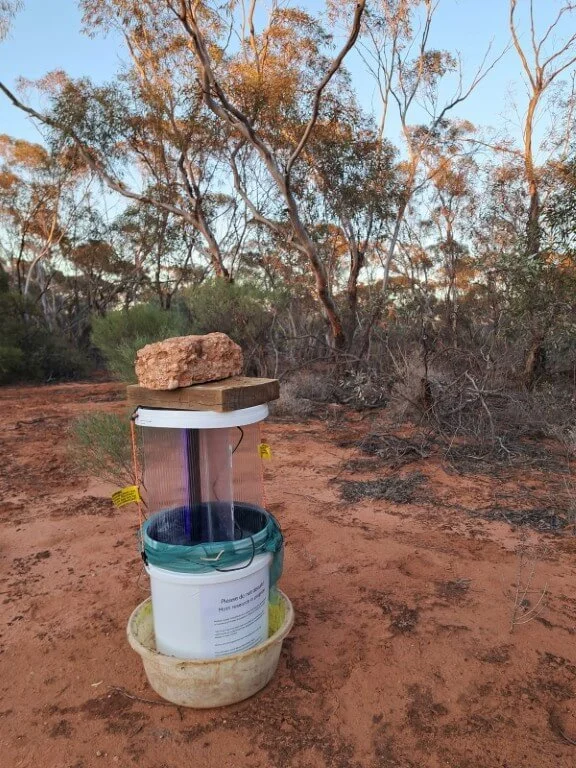
Find a spot in the bush or your garden to hang the bucket from a tree branch, or you can leave it on the ground.
There are two options to drape the netting inside the bucket:
If you are trapping in cool weather - You can simply fold the netting in half and drape it inside the bucket. Make sure the edges inside the bucket overlap by about 5cm so the moths don’t sneak out the sides. Secure the netting at the top of the bucket with a really big elastic band. This is the easiest method if you are going to photograph the moths straight away. You can easily remove the elastic band and then lift the netting out of the bucket and spread it out flat to see your moths.
If you are trapping when the nights are >15oC overnight - You will likely need to subdue your moths in the fridge so you can observe them without them immediately flying away. You’ll need to sew up the sides of the netting to make a bag that goes inside the bucket. In the morning you can remove the bag, place it in the fridge for an hour or two, then open the bag so you can see and photograph the moths. The cold makes them less active so they are happier to pose for photographs. My family loves opening the fridge to find it full of moths.
Once you have arranged the netting inside the bucket, place the funnel in and then sit the vanes on top.
Plug the UV tube light into the powerbank and place the powerbank inside the bucket under the netting (this helps weigh the bucket down).
Hang your light over the vanes, just above the funnel mouth.
You can put the bucket lid on to protect the light from rain showers, and tuck the powerbank into a plastic bag inside the bucket. But it is best not to set it up if lots of rain or wind is forecast.
That’s it! Turn it on in the evening. Go to bed and return first thing in the morning to reveal your moth bounty!
In the photos below, the buckets are sitting in water trays (great idea, Phil and Judy!). This helps to keep ants out. They love to attack the trapped moths. You can use a weight to hold the lid on, or small octopus straps.
For more tips on no-kill moth trapping, including how to stop beetles feasting on your moths see this article “Can no-kill moth trapping be used for research?”
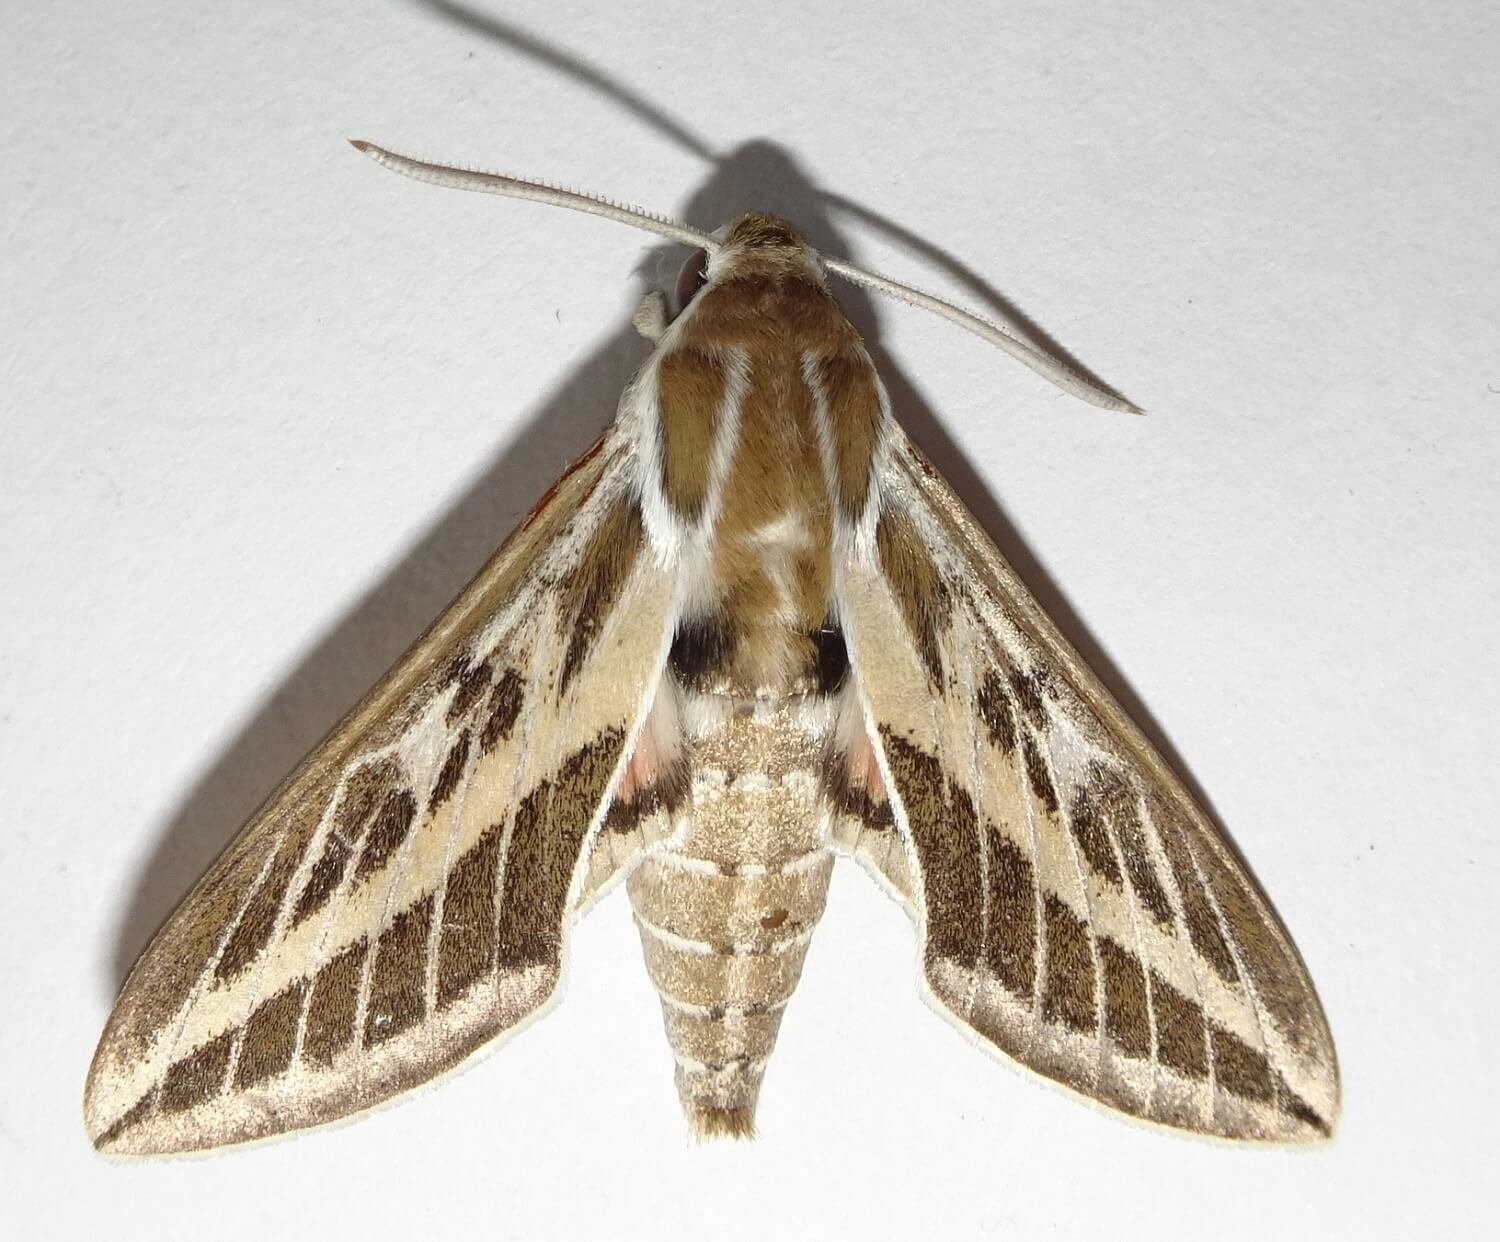
Have fun moth trapping! Look at these beauties you might see!


Caution
〰️
Caution 〰️
The UV lights will attract moths. Sometimes a lot of moths. Occasionally they might choose to explore your ear holes. This is not pleasant. Please wear ear plugs or a beanie so the moths can’t get in.
This project of the Regional Drought Resilience Planning program is jointly funded through the Australian Government’s Future Drought Fund, the Victoria Government and the Natural Resources Conservation Trust.